
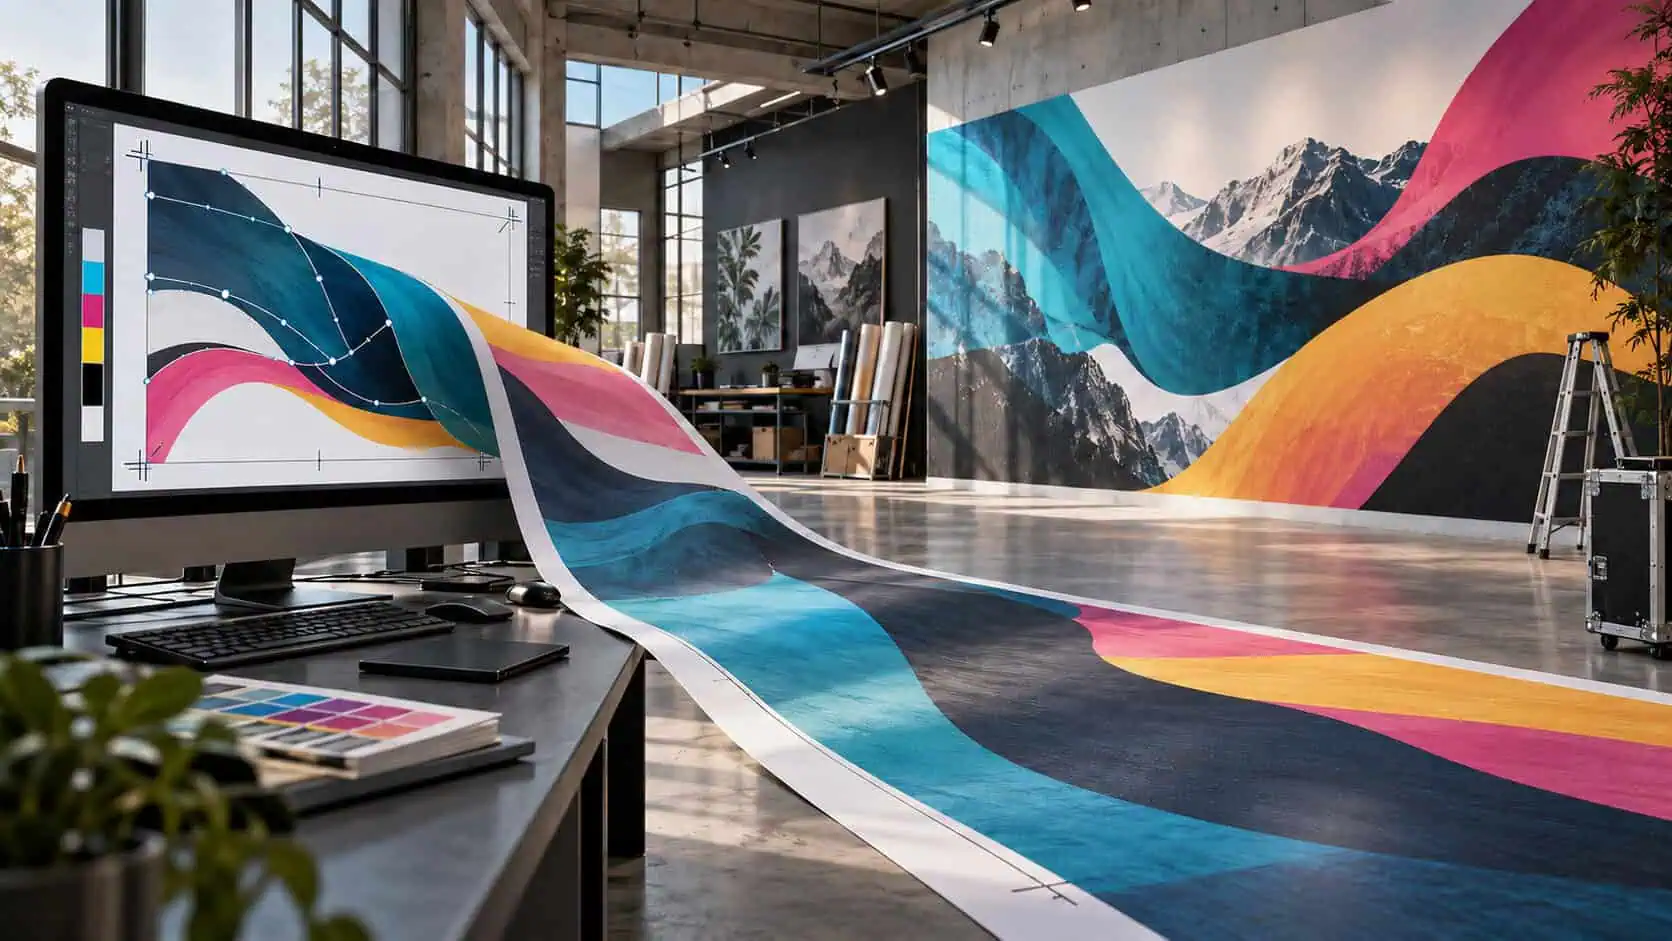
Large format printing can transform a design into a trade show display, wall graphic, banner, window graphic, retail sign or oversized promotional piece.
It can also magnify every problem hiding inside the original artwork.
An image that looks sharp on a laptop screen may become noticeably pixelated when printed eight feet wide. A font that works perfectly on the designer’s computer may disappear when the file reaches the printer. Colors that look vibrant in RGB may change when converted for commercial printing.
Preparing large format artwork correctly from the beginning helps preserve image quality, reduce production delays and produce a finished piece that looks the way your design team intended.
Here are the major factors to consider before sending artwork to a large format printing company.
1. Understand Resolution Requirements for Large Format Printing
One of the most common questions about preparing files for oversized printing is: What resolution should artwork be for large format printing?
The answer is not always 300 DPI.
For brochures, postcards and other materials viewed from close range, designers commonly work at approximately 300 DPI. Large format graphics are different because they are often viewed from several feet away.
A trade show backdrop, building banner or large wall graphic does not necessarily require the same pixel density as a business card.
Viewing Distance Matters
As viewing distance increases, the resolution required to create a visually sharp image generally decreases.
For example:
- Graphics viewed very closely may require higher effective resolution.
- Posters and signs viewed from several feet away can often use lower resolution.
- Large banners, building graphics and displays viewed from much farther away may require even less resolution.
That does not mean you should intentionally submit low-resolution artwork.
It means resolution should be evaluated based on final print size, viewing distance and the printing process being used.
Before enlarging a raster image, check its effective resolution at the size it will actually be printed.
Avoid Simply Enlarging Small Images
Increasing the dimensions of a small JPEG does not create additional image detail.
If a 1,000-pixel-wide image is enlarged dramatically, the software must essentially create additional pixels by interpolation. The result may appear soft, blurry or pixelated when printed.
Whenever possible, begin with the highest-resolution original photograph or image available.
2. Use Vector Artwork Whenever Possible
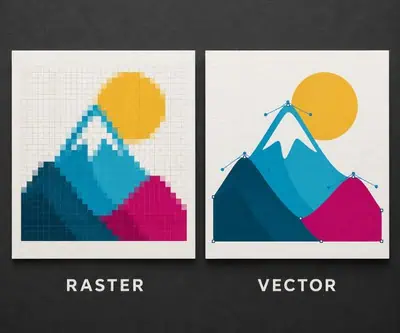
Vector graphics are particularly valuable for large format printing because they can be enlarged without losing sharpness.
Vector files use mathematical paths rather than individual pixels to create shapes, lines and typography.
Common vector file formats include:
- AI
- EPS
- SVG
- Vector-based PDF files
Logos, icons, illustrations, diagrams and typography should ideally remain vector whenever possible.
For example, a vector logo can generally be enlarged from a business card to a large trade show display while maintaining crisp edges.
A small rasterized JPEG version of the same logo may become visibly pixelated.
Raster vs. Vector Artwork
Photographs are naturally raster images and typically use formats such as JPEG, TIFF or PSD.
Logos and graphic elements are usually better suited for vector formats.
Many professional large format printing files contain both. Photographs remain high-resolution raster images while text, logos and design elements remain vector.
3. Set Up Your Artwork at the Correct Size or Scale
Very large graphics can become difficult to work with at full scale.
Instead of designing a 20-foot banner at its actual dimensions, designers sometimes prepare the artwork at a proportional scale.
For example, artwork might be prepared at:
- 100% of finished size
- 50% scale
- 25% scale
- 10% scale
The important part is communicating the scale clearly and adjusting image resolution accordingly.
If artwork is created at 50% scale, for example, the effective image resolution changes when the file is enlarged to its final dimensions.
Always confirm the preferred artwork scale with your printing company before finalizing oversized graphics.
4. Include the Proper Bleed
Bleed refers to artwork that extends beyond the finished edge of the printed piece.
It gives the printer additional image area to work with during trimming and finishing.
Without sufficient bleed, slight variations during production could leave an unwanted white line or unprinted area along the edge of a graphic.
The required bleed varies depending on the product.
A poster may require different bleed than:
- A vinyl banner
- A wall mural
- A trade show display
- A rigid sign
- A window graphic
- A fabric graphic
Do not assume that the standard bleed you use for traditional commercial printing will automatically apply to every large format product.
Ask your printer for the appropriate file specifications.
5. Keep Important Content Inside the Safe Area
Bleed handles what extends beyond the trim area.
The safe area protects what should remain inside it.
Important text, logos, phone numbers, QR codes and other essential design elements should not be positioned too close to edges, finishing areas, seams or hardware locations.
This becomes especially important with products such as vinyl banners.
Grommets, hems and other finishing elements may occupy space near the perimeter of the printed graphic.
A technically correct file can still produce an awkward finished piece if important information is positioned too close to these areas.
6. Prepare Fonts Correctly
Missing fonts can dramatically change a print file.
If a printer opens your source file without access to the fonts used in the design, text may be replaced with another typeface or display incorrectly.
There are several ways to prevent font problems.
Convert Fonts to Outlines
For finalized artwork, designers frequently convert text to outlines.
This transforms the typography into vector shapes rather than editable font characters.
The printer no longer needs the original font file to reproduce the appearance of the text.
However, once text is outlined, editing the wording becomes more difficult. Keep a separate editable version of your original design before converting fonts.
Package Font Files When Appropriate
If editable files are being supplied, your design software may allow you to package the project along with linked images and fonts.
Always make sure you have the proper licensing rights to provide any font files being included.
7. Use the Appropriate Color Profile
Screens and printers create colors differently.
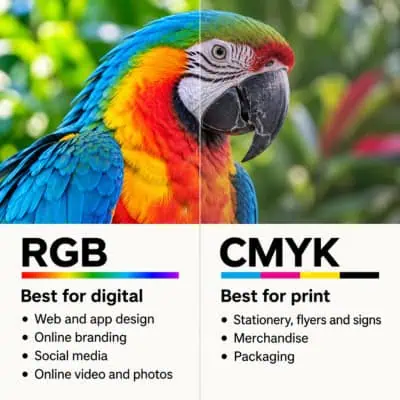
Computer monitors generally display colors using RGB, which combines red, green and blue light.
Commercial printing commonly uses a CMYK-based workflow, using cyan, magenta, yellow and black inks.
Because RGB displays can reproduce some bright colors that CMYK printing cannot match exactly, artwork may change slightly when converted for printing.
This is especially noticeable with:
- Bright blues
- Neon-like colors
- Highly saturated greens
- Intense oranges
- Certain vibrant digital colors
Working within an appropriate print color space helps create more predictable results.
Your printer may also provide specific color profile recommendations based on its equipment, substrates and production workflow.
What About Pantone Colors?
Brand-sensitive projects may require specific Pantone or spot colors.
However, the ability to reproduce a particular Pantone color depends on the printing process and equipment being used.
If exact brand color matching is important, discuss those requirements with the printer before production begins.
8. Check Linked Images Before Sending the File
Design programs such as Adobe Illustrator and InDesign may reference images stored elsewhere on your computer rather than embedding them directly inside the artwork.
If those linked files are missing, the printer may receive an incomplete document.
Before sending artwork, confirm that all photographs, textures, graphics and other placed images are either embedded or properly packaged with the final design files.
A PDF export can also help consolidate artwork into a more portable print-ready file, depending on the printer’s preferred workflow.
9. Pay Attention to File Size
Large format artwork can create very large files.
High-resolution photographs combined with oversized dimensions, multiple layers and embedded graphics can easily result in files hundreds of megabytes or even several gigabytes in size.
Bigger is not automatically better.
Extremely oversized raster files may slow down:
- File transfers
- Design software
- Prepress workflows
- RIP processing
- Production
The goal should be to provide enough image information to produce excellent print quality without creating unnecessarily massive files.
This is another reason understanding viewing distance and effective resolution is important.
A knowledgeable large format printer can help determine whether your artwork contains more resolution than the final application actually needs.
10. Avoid Excessive Image Compression
JPEG compression can significantly reduce file size, but aggressive compression can introduce visible artifacts.
These often appear around:
- Text
- Logos
- Fine lines
- High-contrast edges
- Detailed photography
Compression artifacts that seem minor on a monitor may become more obvious once the artwork is enlarged.
When possible, use high-quality source images and avoid repeatedly saving and recompressing JPEG files.
TIFF, PSD, high-quality JPEG and properly exported PDF files may all be appropriate depending on the artwork and printing workflow.
11. Check Transparency, Effects and Layers
Modern design files frequently use:
- Drop shadows
- Transparency
- Blending modes
- Masks
- Gradients
- Clipping paths
- Complex layered effects
These features usually work well when files are prepared properly, but unusual effects can occasionally create problems during file conversion or raster image processing.
Exporting a print-ready PDF using the printer’s recommended settings can reduce potential compatibility issues.
When producing especially complex artwork, reviewing a proof before full production is a smart precaution.
12. Design for the Final Viewing Environment
Artwork preparation is about more than technical file specifications.
The design itself needs to work at scale.
A graphic viewed from 15 feet away should not be designed the same way as a brochure held in someone’s hand.
Consider:
- Viewing distance
- Text size
- Contrast
- Visual hierarchy
- Lighting
- Installation location
- Indoor versus outdoor use
- Sign dimensions
- Background environment
For trade show graphics, viewers may only have a few seconds to understand your message while walking past the booth.
For building signage, readability from a parking lot or roadway may be more important than small visual details.
Large format design should prioritize clarity and impact.
13. Review the Entire File at Final Size
Before sending the artwork to production, perform a final preflight check.
Look for:
- Low-resolution images
- Pixelated logos
- Missing fonts
- Incorrect dimensions
- Missing bleed
- Text outside the safe area
- Unexpected RGB colors
- Missing linked images
- Transparency issues
- Spelling errors
- Incorrect phone numbers
- Broken QR codes
It can also help to zoom into individual images and review them at their effective print resolution.
One final review can prevent an expensive mistake from becoming several feet wide.
Common Large Format Printing File Formats
Your printer should always provide the final requirements for your specific project, but common professional artwork formats include:
PDF: Often one of the easiest formats for delivering print-ready artwork while preserving vector elements, fonts and images.
AI: Adobe Illustrator files are commonly used for vector-based signage and graphics.
EPS: A traditional vector format frequently used for logos and graphic artwork.
TIFF: Commonly used for high-quality raster images.
PSD: Useful when layered Photoshop artwork needs to remain editable.
JPEG: Acceptable for some photographic artwork when sufficient resolution and minimal compression are maintained.
The best file format depends on the type of graphic, design software, printing equipment and finishing requirements.
Before Sending Your Large Format Artwork to Print
A large format printing project often represents a significant investment.
Trade show booths, banners, wall graphics, retail displays and environmental graphics are designed to attract attention. Poor-quality artwork can undermine that investment before the piece is even installed.
The safest approach is to communicate with your printer early.
Ask for artwork specifications before your designer builds the final file. Confirm dimensions, scale, bleed, resolution, color requirements, preferred file format and finishing considerations.
RoyerComm works with businesses and marketing teams to produce professional large format graphics for a wide range of applications. Our team can help evaluate artwork, identify potential file issues and guide you through preparing graphics for production.
If you are planning a banner, display, sign or other oversized printed piece, contact RoyerComm to discuss your large format printing project and artwork requirements.
Frequently Asked Questions About Large Format Artwork
What resolution should an image be for large format printing?
There is no single resolution requirement for every large format print. The appropriate resolution depends on the final dimensions, printing process and expected viewing distance. Graphics viewed from farther away generally require lower effective resolution than materials viewed at close range.
Does large format printing need 300 DPI?
Not always. While 300 DPI is commonly associated with high-quality commercial printing, many oversized graphics can be produced effectively at lower resolutions because they are viewed from a greater distance. Ask your printer for the recommended effective resolution for your specific application.
Should large format artwork be CMYK or RGB?
Commercial printing commonly uses a CMYK-based color workflow, although production systems and equipment vary. Converting artwork appropriately helps reduce unexpected color changes between a computer monitor and the printed piece. Your printer can provide the preferred color settings.
What file format is best for large format printing?
PDF, AI, EPS and TIFF are commonly used professional formats. Vector-based PDF or Adobe Illustrator files are particularly useful for graphics containing logos, text and illustrations. The preferred format depends on the printer and the type of artwork being produced.
Should I convert fonts to outlines before printing?
Converting fonts to outlines can help prevent missing or substituted fonts when artwork is opened on another system. Keep a separate editable copy of the artwork before outlining text because outlined fonts are more difficult to edit later.
Why do logos look blurry when enlarged?
A blurry logo is often a low-resolution raster image such as a small JPEG or PNG that has been enlarged beyond its original dimensions. Vector logo files such as AI or EPS artwork can typically be enlarged significantly without losing sharpness.
How much bleed is needed for large format printing?
Bleed requirements vary by product, printing equipment and finishing method. Banners, wall graphics, signs, displays and traditional printed pieces may all have different specifications. Always confirm the required bleed with your printing company before preparing final artwork.
Can I use a JPEG for a large banner?
Yes, provided the JPEG has sufficient resolution at the final print dimensions and has not been heavily compressed. For logos, typography and graphic elements, vector artwork is generally preferable.
Why do printed colors look different from my monitor?
Computer screens produce color with RGB light, while many printing processes reproduce color using inks or pigments. Screens can display certain bright colors that are difficult to reproduce exactly in print. Monitor calibration, color profiles, paper or substrate type and printing equipment can all affect the final appearance.
How can I tell if my artwork is print ready?
Verify the final dimensions, artwork scale, effective image resolution, bleed, safe areas, fonts, color settings, linked graphics and file format. For important projects, having your commercial printer review the artwork before production is one of the best ways to identify potential problems.
RoyerComm is here to help you with your next large format print project. Get in touch with our team today!